Access to files on a network with handheld
Unlike the PC PDAs are not equipped with the normal built-in access to shared network resources, so no special software we can not do. Personally, I prefer to use for network surfing file manager Resco Explorer. Despite the fact that I have is a little outdated software versions, as PDAs from Dell when installing honestly warned me, there are no obvious problems in the work I have not discovered.
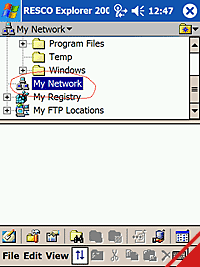
So, after running the program in the main window, you are offered for viewing several species drop directories: - My Device - to view the files on your PDA and memory cards
- My Network - search for available computers and its shared "folder on the network
- My Registry - Registry Tools
- My FTP Locations - access ftp servers.
We are interested in the folder My Network. Click on it and hold the stylus for a while. There is a drop-down menu where we choose Map Drive.
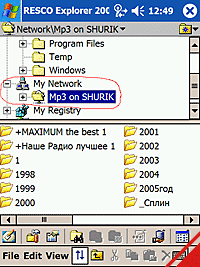
After receiving this command, Resco Explorer, similar to Windows XP, searches for computers on the network and provides a list of them. Come on any one found a PC, select the desired folder and press Share, ie, access. In this case, the selected folder is placed in the list of My Network, and all its contents immediately becomes available to you. To possible requests from programs "name" and "password" when accessing network resources (computers), if you are not set, ignore, push "OK".
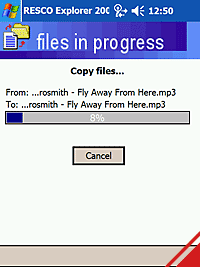
The files you can select and copy itself to your PDA or memory card.
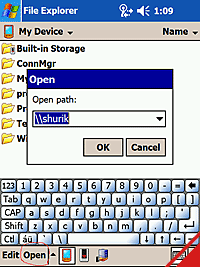
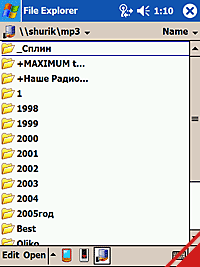
You can also open files remotely. If the data file extension asotsiirovana program, it will start. For example, when you click on the mp3 file, just run Windows Media Player and start listening. Access to network resources can be made with the built-in Windows Mobile. This, however, less convenient. First, you need to know in advance the name of the computer to which you want to access. Then you start the File Explorer and in the menu (below), select Open. In the resulting window, type the computer name.
And the press - "OK". After a moment you are available to all public access directory. You go to any and copy any files on your PDA.
The second disadvantage is waiting for you when using File Explorer, - is that run directly on the play (the same mp3-file) or simply open a file on a network you do not succeed (at least for me it did not work). Must first copy on the PDA.
Access to FTP resources
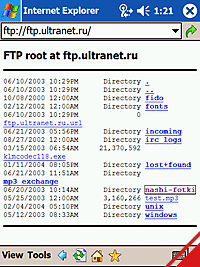
Unfortunately, access to the FTP network resources using Resco Explorer I could not. However, this is not a reason to be upset. With the FTP successfully manages your browser Internet Explorer, need only enter in the address bar the name of a network resource, as shown in the picture below.
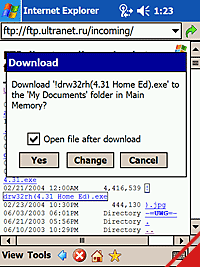
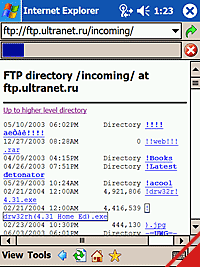
In the program, you will have access to all subdirectories and files. Any files can be downloaded directly to your PDA by simply clicking on them. You can even put a tick in the «Open file after download», that is, run the file after downloading.
So, click Yes and swing.
Direct connection to a "computer-computer via Wi-Fi
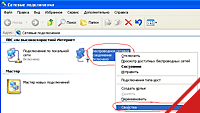
Imagine that you have no access point and buying it is not expected. But you have found two PDAs with Wi-Fi or Pocket PC and desktop PC (laptop) with wireless module. In such a situation any of these two devices also can be connected to the network. This type of connection is called "computer to computer. Let's look at what the settings should be made when necessary to connect, for example, a desktop (laptop) and Pocket PC Dell Axim X50v. First, the settings on your PC. Install drivers and plug the Wi-Fi adapter to your desktop computer. On the Windows message about the possible attention of the detected networks do not pay attention. After installing the adapter in "Network Neighborhood" on the desktop there is a new icon of the wireless connection. Click the right mouse button and select "Properties."
 |
On the General tab, double-click on the item "Internet Protocol (TCP / IP)». Select "Use the following IP address" and type - 192.168.0.1. Subnet Mask - 255.255.255.0. Other fields do not touch. Click "OK". Click the tab "Wireless Networks". Under "Preferred networks" click "Add". We create our network - computer to computer.
 |
Introduce any network name - SSID, turn on encryption, WEP, remove the check mark "key is provided automatically, enter your" Network Key "and the next field to repeat it. And finally, most importantly. At the bottom of the window set a tick in the "This is a computer-computer. Access points are not used. " Click "OK". Again click "OK" and the settings take effect. Now configure the Pocket PC Dell Axim X50v. To start activate Wi-Fi. Immediately get the message about the detected network with a proposal to connect it to The Internet or Work. Reject the offer and go to settings Wi-Fi (click on the icon at the bottom) and the WLAN Utility program press the button «Settings».
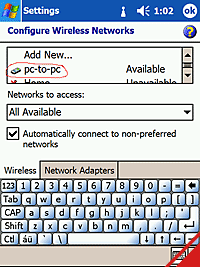
Before us is a list of available networks and the networks that we have ever connected. Immediately detected and our new network (pc-to-pc). Push the stylus on its behalf.
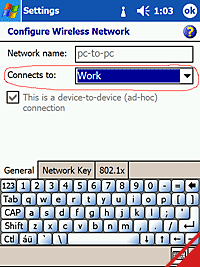
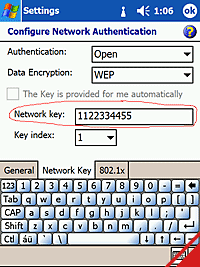
In the Connects to the General tab, specify - Work. Just below visible checked in «This is device-to-device (ad-hoc) connection», then there is a connection "computer to computer." "Tick" is not available and it is correct. Turn on the Network Key tab and enter the WEP key (the same as on a PC).
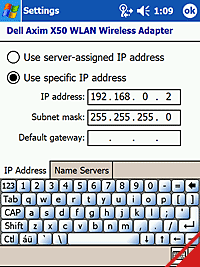
Click "OK". We turn to the tab Network Adapters. It remains to configure the network settings device. Click the stylus on the Dell Axim WLAN Wireless Adapter. In the resulting window, enter the new IP devices. It must be different from the IP desktop only the last digit, for example, 192.168.0.2. The subnet mask is the same - 255.255.255.0.
On the Name Servers tab, all fields are left blank. We press "OK". We agree with the pop-up warning (click "OK") and in the utility WLAN Utility software and turn off (the button Turn Off) and include (the button Turn On) Wi-Fi adapter. After a few seconds to happen connection. To test the connection, follow these steps on your PC. Sign in Start Menu - Run, type «ping 192.168.0.2». In the resulting window you should see the following picture:
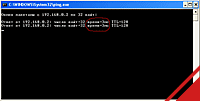 |
If the item "Time" are some numbers, then all you have running. But if the message "timed out a request, then you have no connection. Check the settings. When connecting a computer-computer ", you will also become available to all the joys of wireless network access point: open access to the resources of the PC, wireless synchronization, and, of course, the World Wide Web. To access the Internet with this connection you need on the desktop to perform on the network card connected to your ISP, the same procedure as described in the chapter "Simple Connection", in the first part of this article.
Synchronize PDA and desktop via Wi-Fi
Synchronizing via Wi-Fi between the handheld and desktop computers is carried out only in manual mode. This means that every time you have to run it independently via ActiveSync on the mobile computer. The order of organization of communication - the next one. To begin insert PDA into the cradle and perform a full sync (no link "guest") with personalkoy. In the course of the dialogue select - Synchronize with your computer "and then point out specifically what we are synchronizing. Once the process of data transfer is complete, take out the CCP from the cradle (sync when it breaks), we go on it in the menu of ActiveSync - Tools - Options. On the Advanced tab in the PC section, «Use this PC» should see the name of your desktop, select it.
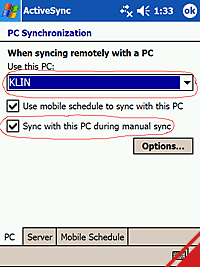 |
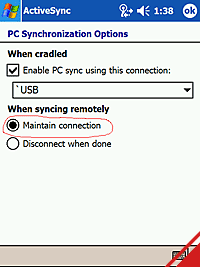
It's also a checkbox in the «Sync with this PC during manual sync». Click the Options button and check the box in the «Maintain connection» in paragraph «When syncing remotely». CCP in this case will remain connected to a desktop computer and after synchronization. Respectively, and all the files on the PDA will be available from the desktop via the "Explorer".
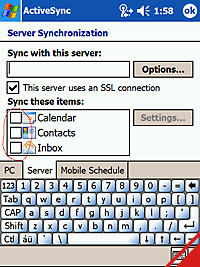
Click "OK". Go to the tab «Server» - Section «Sync this items» tab and «Mobile Schedule». We see that there is not no points allocated.
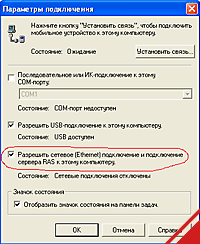
We press "OK" and exit the main window of ActiveSync. Is the last key settings. On the inactive icon ActiveSync on deskope click the right mouse button and choose "Connection Settings". Set a checkmark in "Allow network (Ethernet) connection, and RAS server connection to this computer".
Now boldly push the button Sync in ActiveSync on the PDA and sync process runs without any problems.
To turn off the PDA from the desktop, press Stop.
Conclusion
I hope that this manual has helped you to deal with most zakovyk associated with the organization, connecting, and handheld computers (not only) in the W-Fi wireless networks. The main emphasis in the material was made based on what how to make the equipment work properly, and almost no attention was paid to the important question of how wireless security. The thing that is mentioned here Encryption WEP - this is the easiest and very unreliable way to protect against unauthorized access. Therefore, if you want to feel protected, I recommend you continue to learn the material, focusing on security Wi-Fi, the benefit that the internet they abound. The authors, translation:
